Motion Symphony is designed in a modular way to help improve flexibility and re-usability of data. The first module that you need to create to get started is the ‘Motion Config’ module (or asset).
What is the Motion Config Module For?
The motion config module is used to define exactly what it is you want to match. In the typical case of motion matching this could be the past and future trajectory points and the bones you wish to match in the pose. This module will inform your motion database, your trajectory generator and your runtime motion matching node what data is relevant for matching.
Additionally, as of Motion Symphony 2.0, ‘Motion Config’s now also hold the default calibration for motion matching internally based on the weightings set for match features by the user.
Please read the next few sections learn how to create a config module and set it up properly.
Creating the Module
To create this asset right click in your content browser and navigate to ‘Animation > Motion Match Config’. After choosing 'Motion Match Config’ a new asset will be created as shown in the below image.

After naming your config asset you will be prompted to set a skeleton on associate with the asset.
Module Setup
Open up the details editor for the config module (see below) by double clicking on it and follow the steps below:
Step 1: Declare the Skeleton - Choose a skeleton as the ‘source skeleton’ in the ‘general’ foldout. This is the skeleton that you intend to use motion matching with for any particular character. This is required before setting any bones in the pose configuration.
Note: Any character you wish to use with this motion config will need to either use the same skeleton or be a compatible skeleton.
Step 2: Set the Up Axis and Forward Axis - An ‘Up-Axis’ of ‘Z’ and ‘Forward Axis’ of ‘Y’ is standard for UE5 characters. If you are using a character setup in this standard way, you will not need to change these settings. However, if not, you may have to modify the settings to match how you have setup your character skeleton.
Step 3: Add Input Response Match Features - Usually this is just a trajectory match feature, however, there are other match features that can be used for input response as listed below:
Under the foldout for the match feature, configure the settings appropriately for the match feature chosen. Be sure to set the default weightings as well to inform the initial calibration. Calibration may take some getting used to but there are some recommended starting points for calibration provided in the next section.
Step 4: Add Quality Match Features - Under the ‘Pose Quality Features’ foldout, add match features related to pose quality. This usually includes things like bone locations and velocity. Match features that can be used for quality. include:
Under the foldout for the match feature, configure the settings appropriately for each. Be sure to set the default weightings as well to inform the initial calibration. Please see the sections relating to each individual match feature to get an understanding of what they do.
Note: A common mistake is to match many bones in the body. However, this is not necessary, and it impedes performance. Start withthe recommended configuration shown in the next section and expand from there if needed.
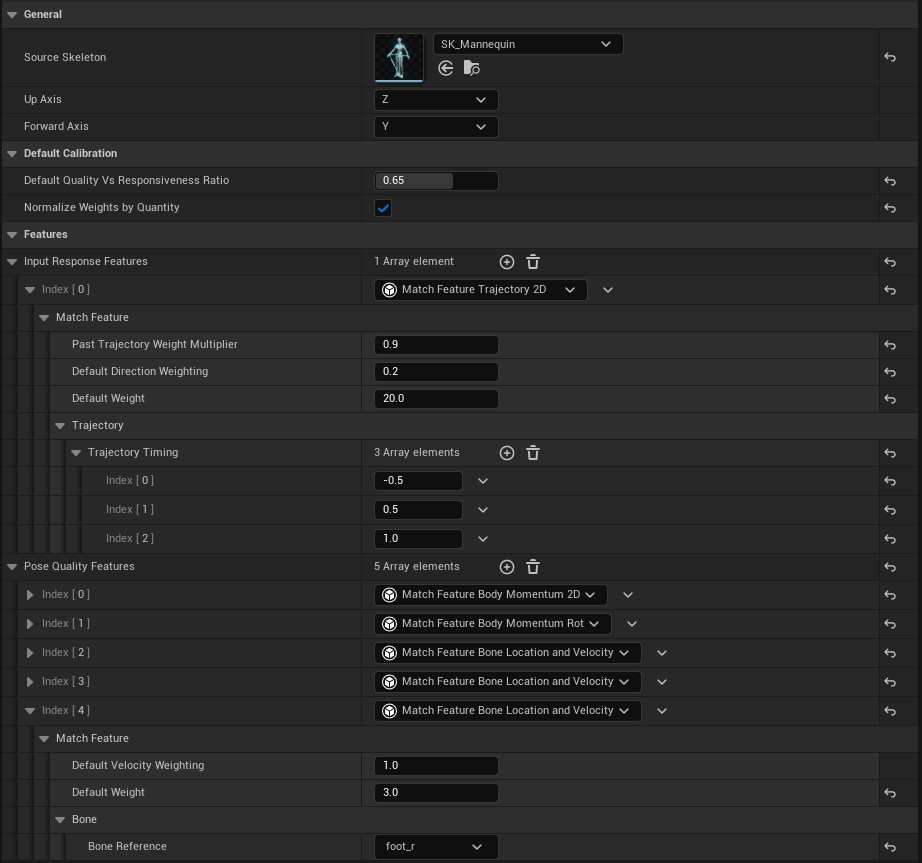
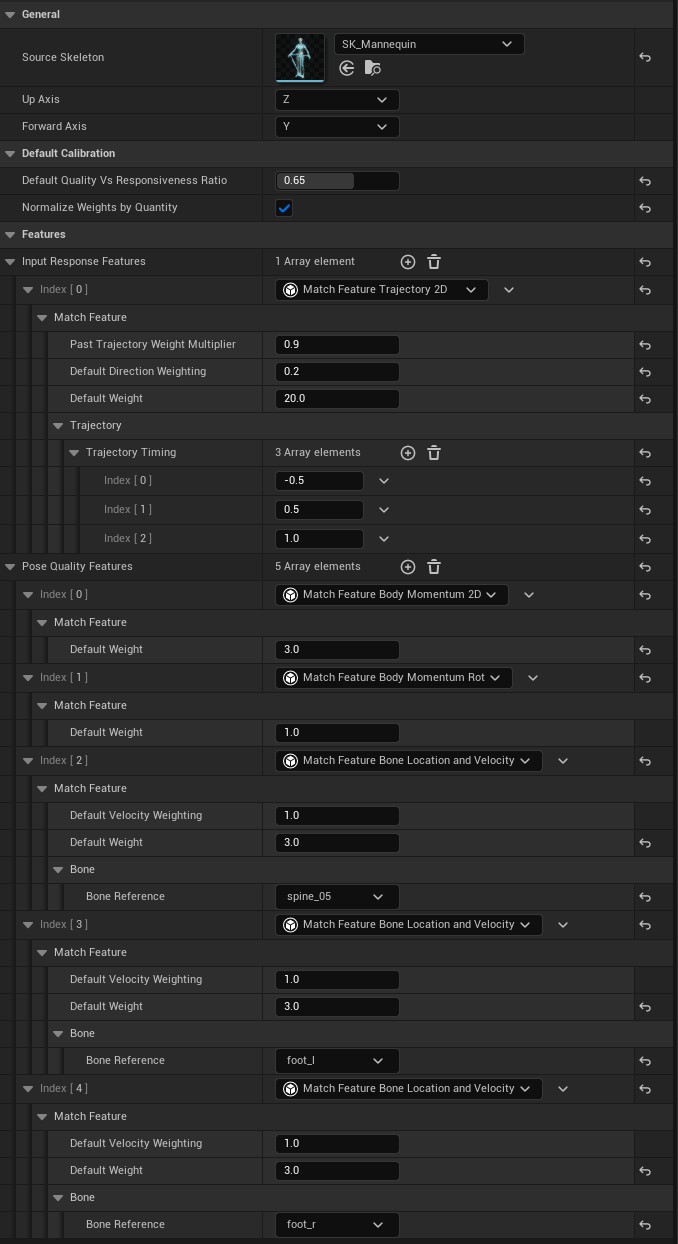
Recommended Starting Configuration and Weightings
When starting out with motion matching, it can be very challenging to know where to start with configuration, particularly with default weightings. This section is intended to give a good minimum starting point and some recommendations for going forward with your own experimentation. Please be aware that this is a minimal setup, you may need to make adjustments for your project:
Default Quality Vs. Responsiveness Ratio: 0.525
Normalize Weights by Quantity: TRUE
Input Response Features:
Trajectory 2D (3 points)
PastTrajectory Weight Multiplier 0.9
Default Direction Weighting: 0.2
Default Weight: 20.0
Trajectory Timing: -0.5s, 0.5s, 1.0s
Quality Features:
Body Momentum 2D
Default Weight: 1.5 - 3.0
Body Momentum Rot
Default Weight: 1.0
Bone Location and Velocity
Default Velocity Weight: 1.0
Default Weight: 3.0
Bone: Foot_L
Bone Location and Velocity
Default Velocity Weight: 1.0
Default Weight: 3.0
Bone: Foot_R
Bone Location and Velocity
Default Velocity Weight: 1.0
Default Weight: 3.0
Bone: Spine_03 (upper spine)
This is how it looks in the editor:
What Next?
Once you have completed the initial setup of the ‘Motion Config’ module you shouldn’t have to change it again unless you want to experiment with different features for different animation outcomes. It will be slotted into your ‘Motion Data Asset’ and ‘Trajectory Generator’ for use later in the pipeline. Please refer to the relevant sections of the manual for more details.