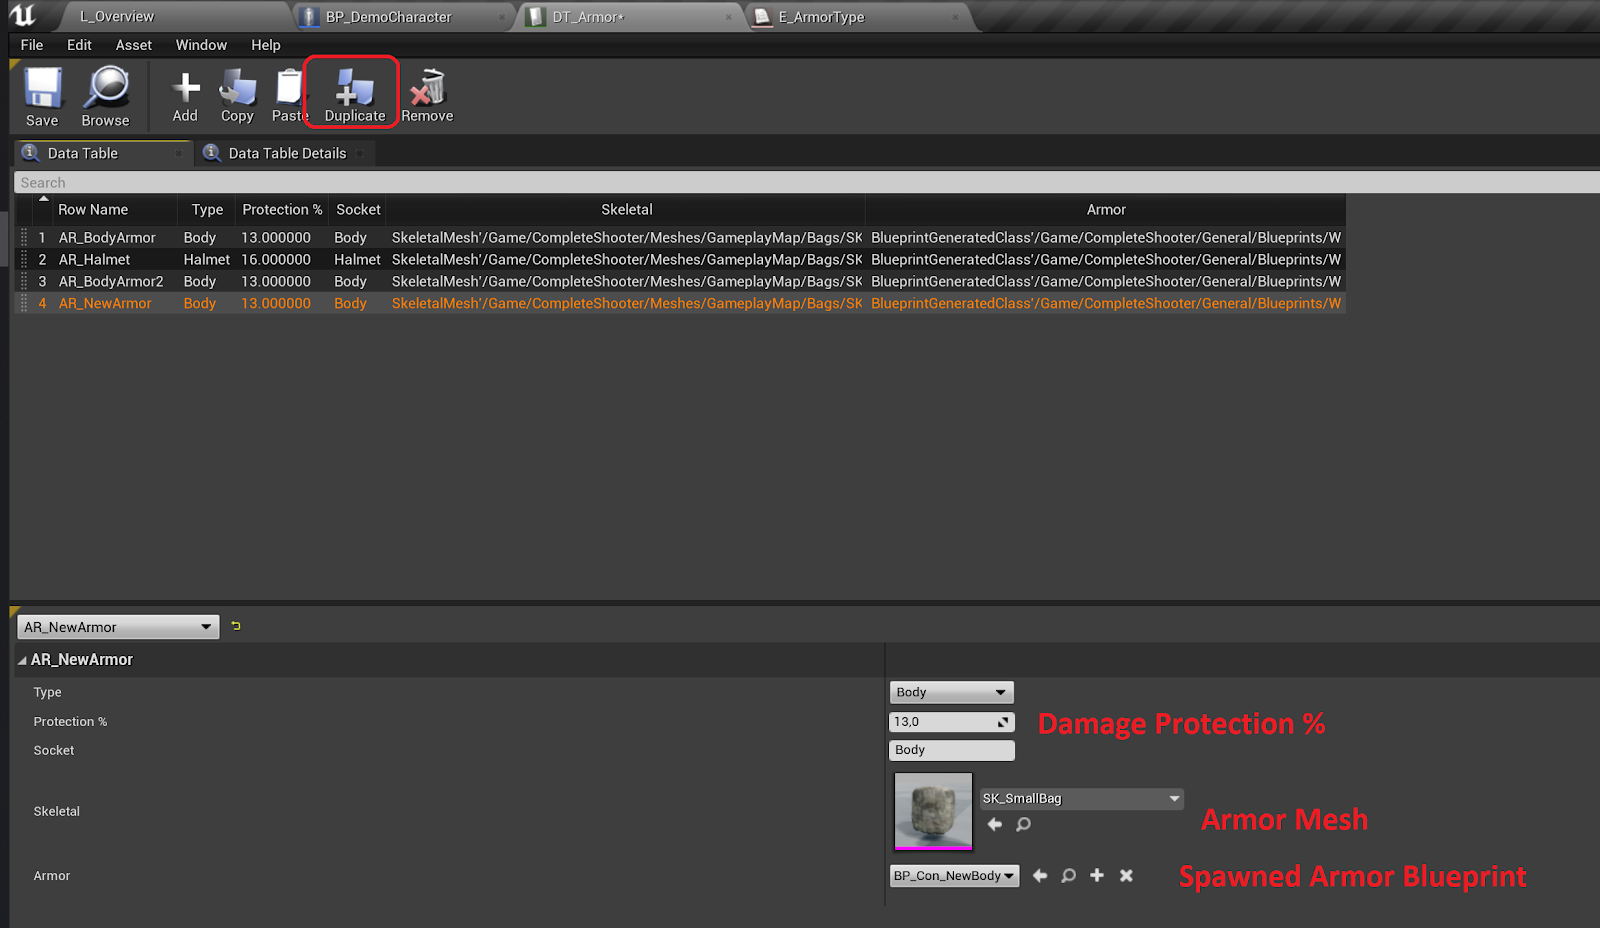
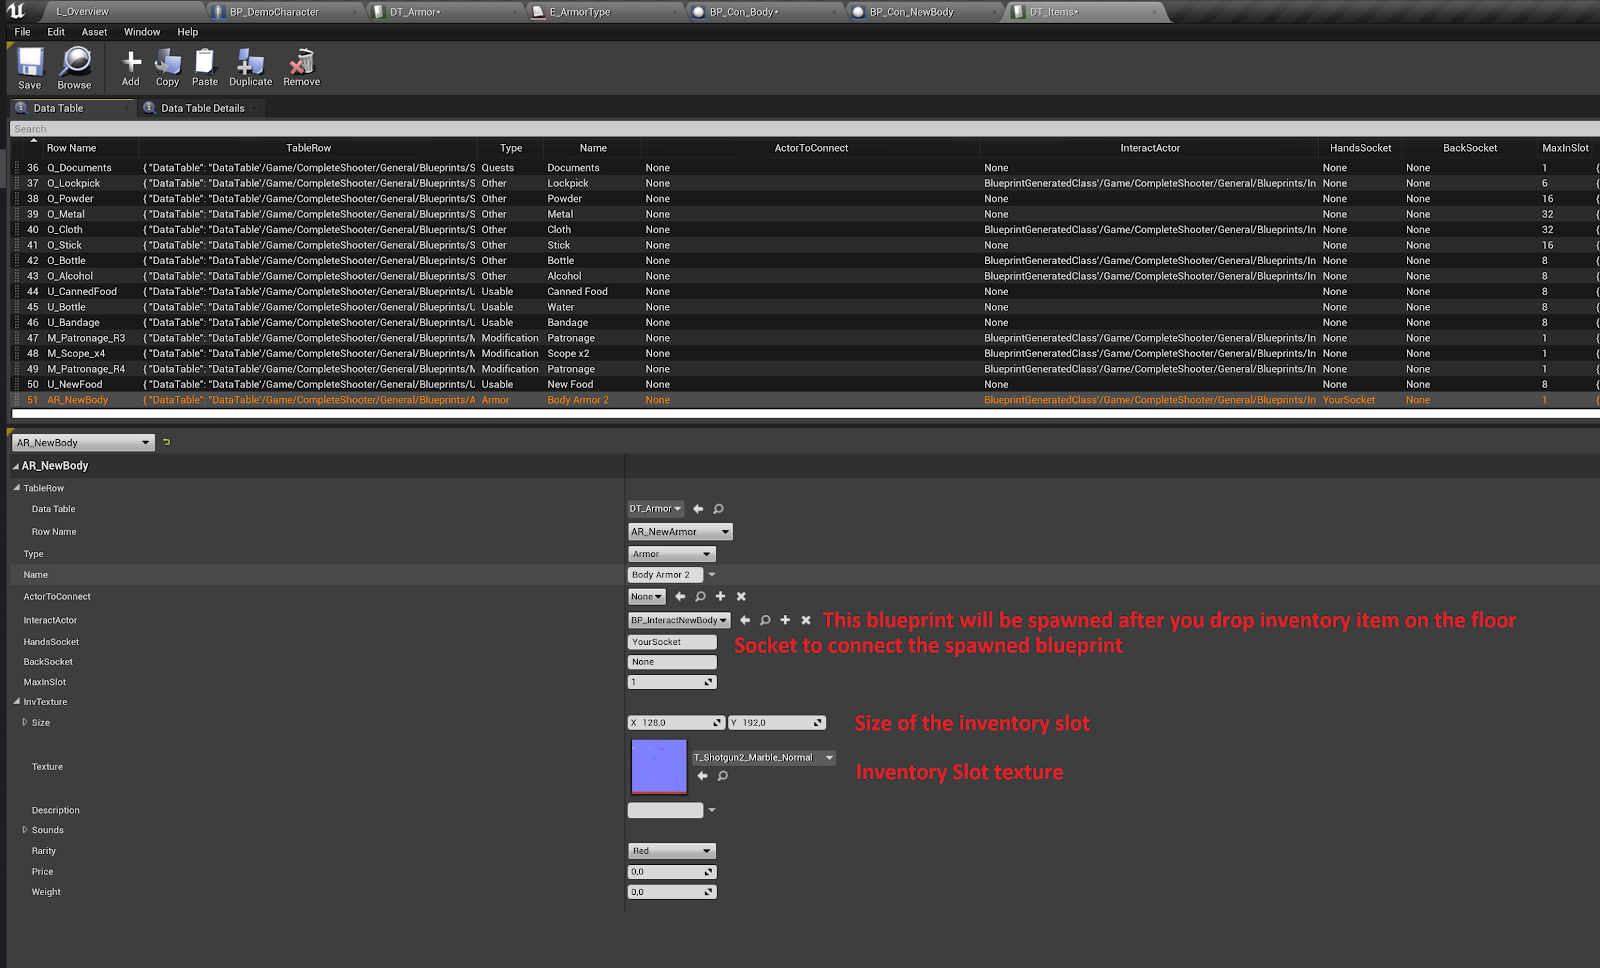
To add a new armor you need to open DT_Armor and duplicate any row you want. In this data table you can set the type of the armor, it’s mesh, protection and custom blueprint
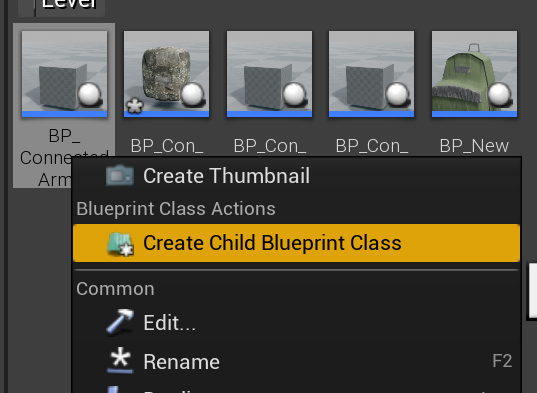
If you want to have a custom blueprint for your spawned armor you can change the Armor Blueprint. To do this you need to create a Child Blueprint Class using the ConnectedArmor.
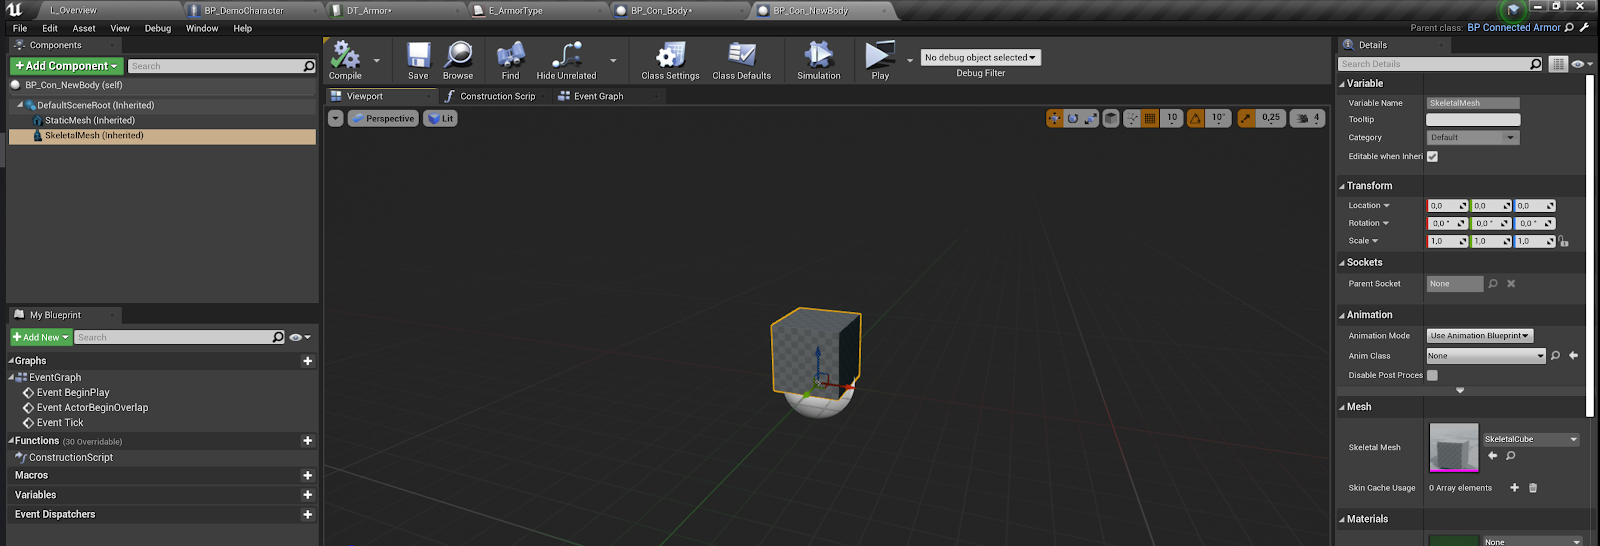
To this blueprint you can add any component you want, the skeletal mesh will be initialized with a mesh from the data table on begin play.
To use it in the game you need to initialize the armor in the DT_Items. In the InvTexture structure you need to set an information about your item: it’s size and texture.

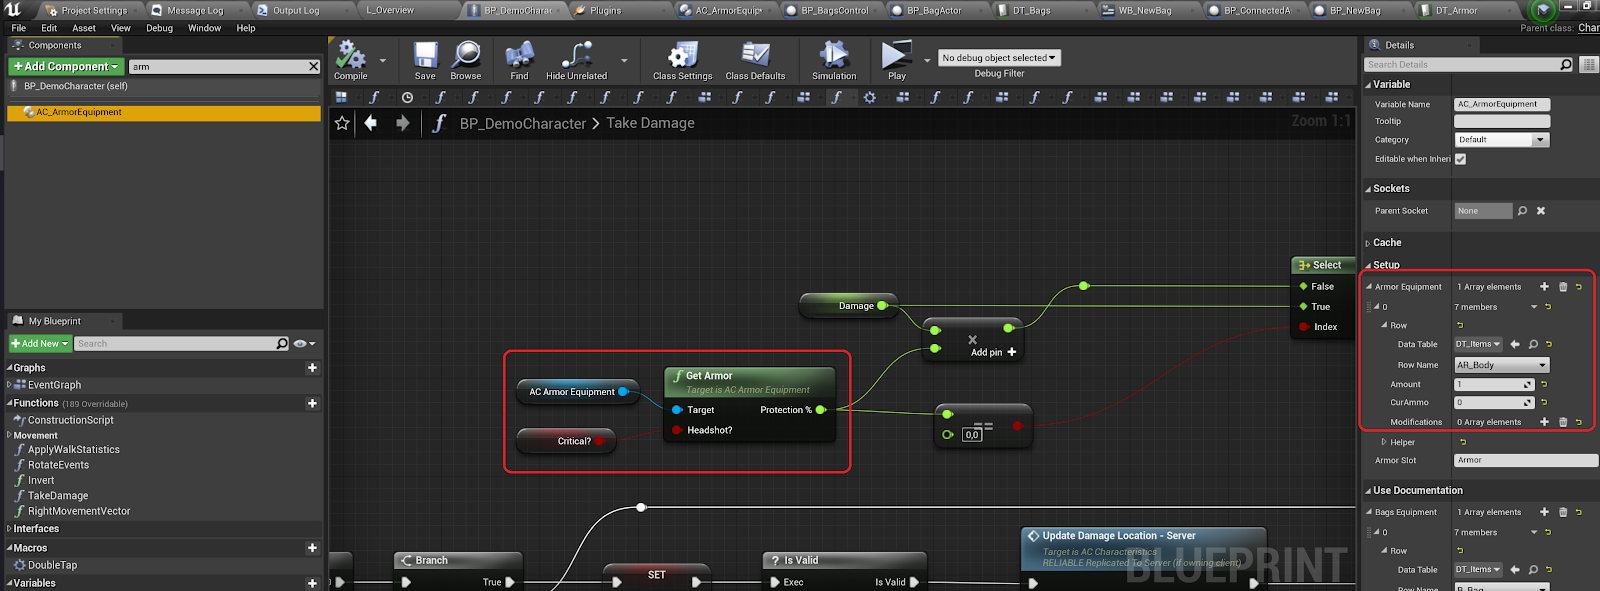
You can add armor by default in the AC_ArmorEquipment component. Add it to the Armor Equipment array. If you want to get armor you need to use the GetArmor function.
Creating a new bag
You can create two types of bags in this project: backpack and belt. The logic of adding a new item is the same for the belt and the bag, the only difference is in the inventory: you can’t put the belt on the bag’s slot or bag on the belt’s slot.
Here is how you can create a new bag:
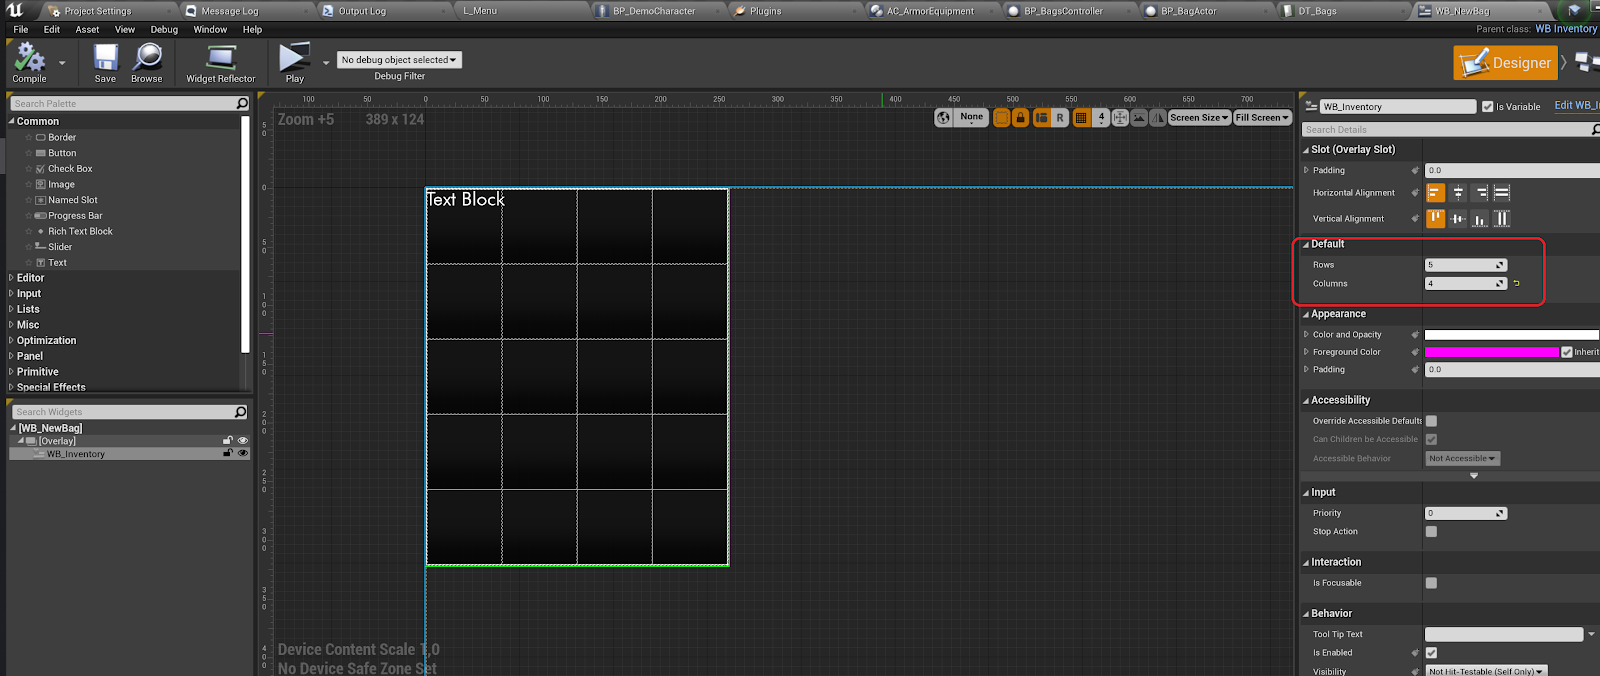
In the widget you can select the size of the inventory you want to have
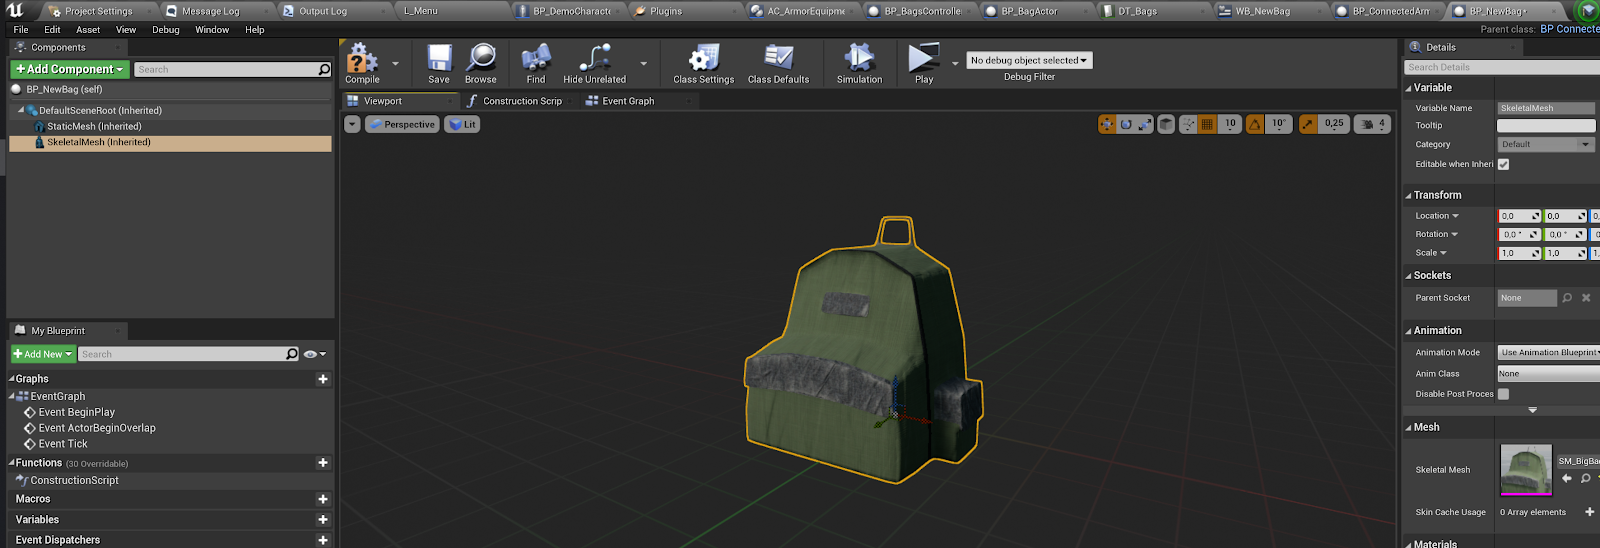
In the blueprint you can select your own skeletal mesh that you want to use and add any other component
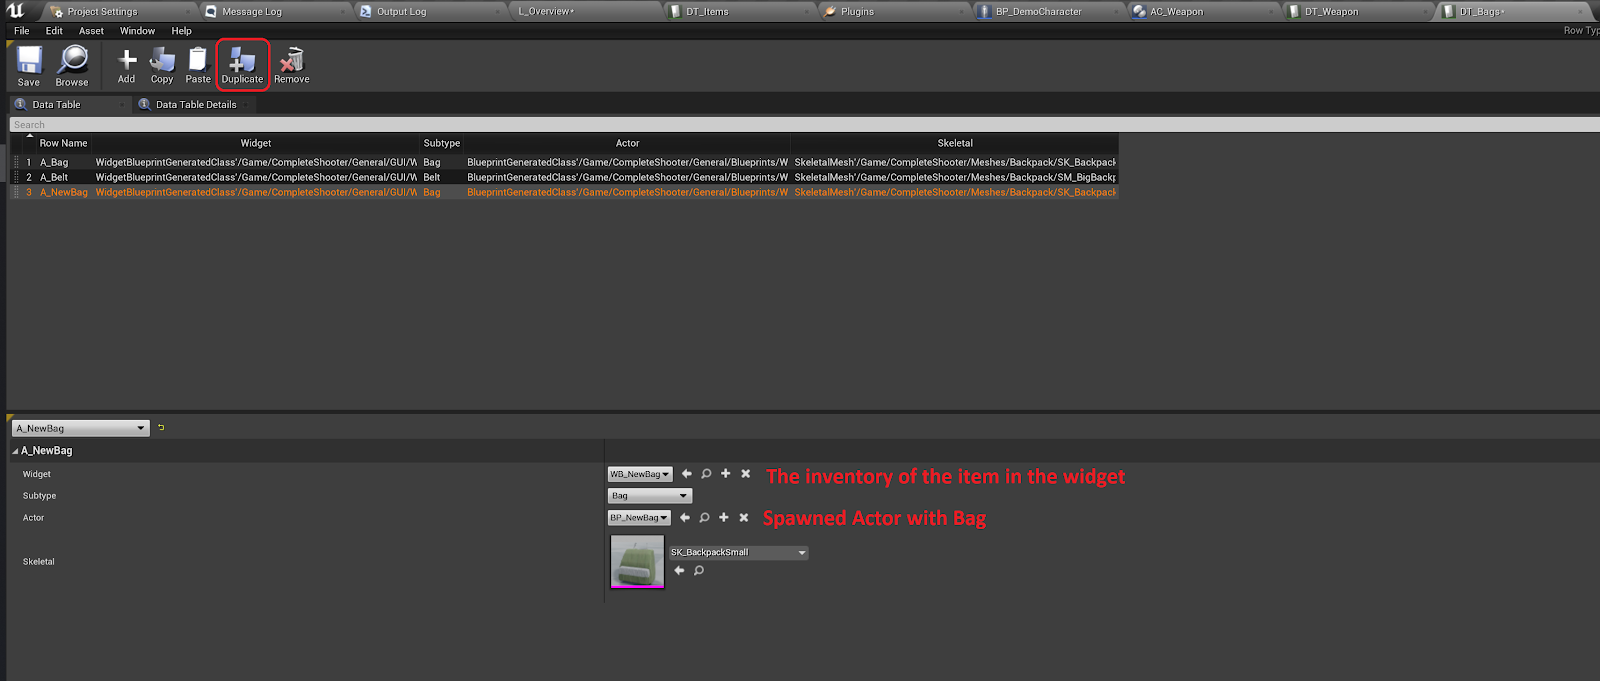
Now you can add it to the DT_Items
You can add a bag by default in the ArmorEquipment, add a new array row and select your bag here:
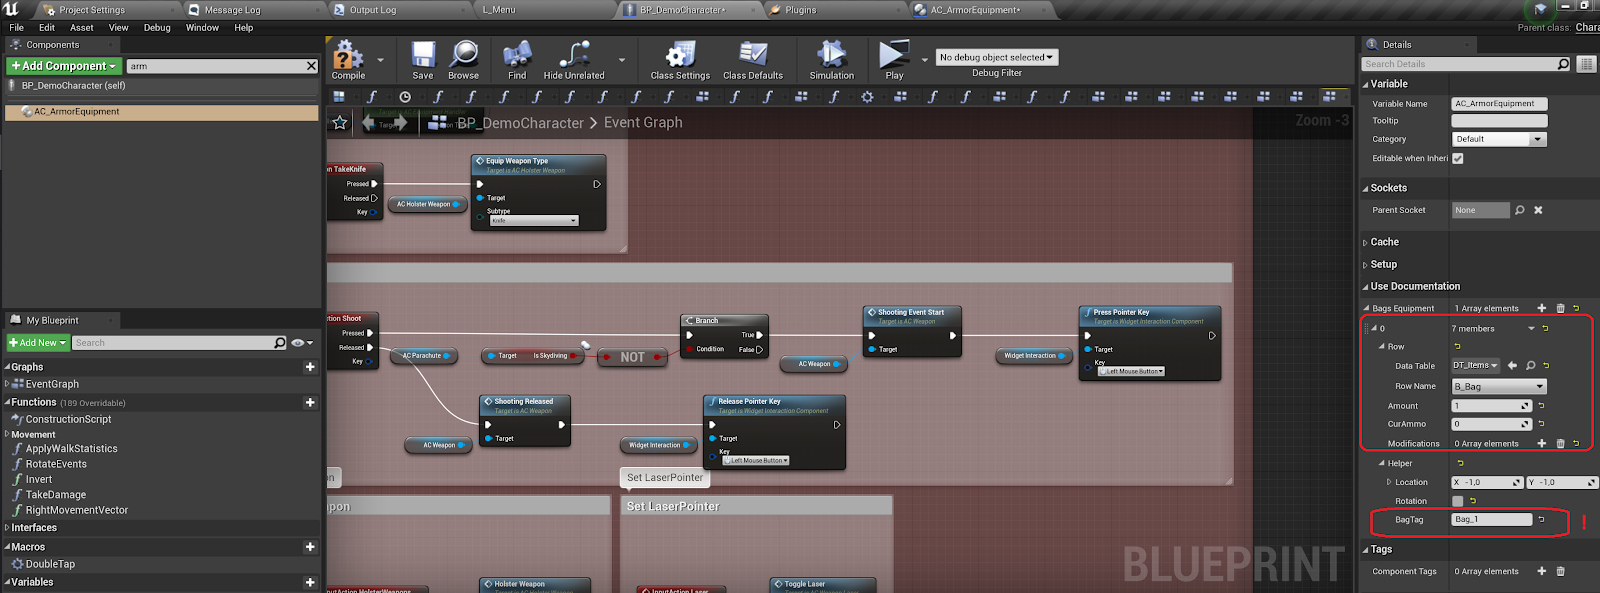
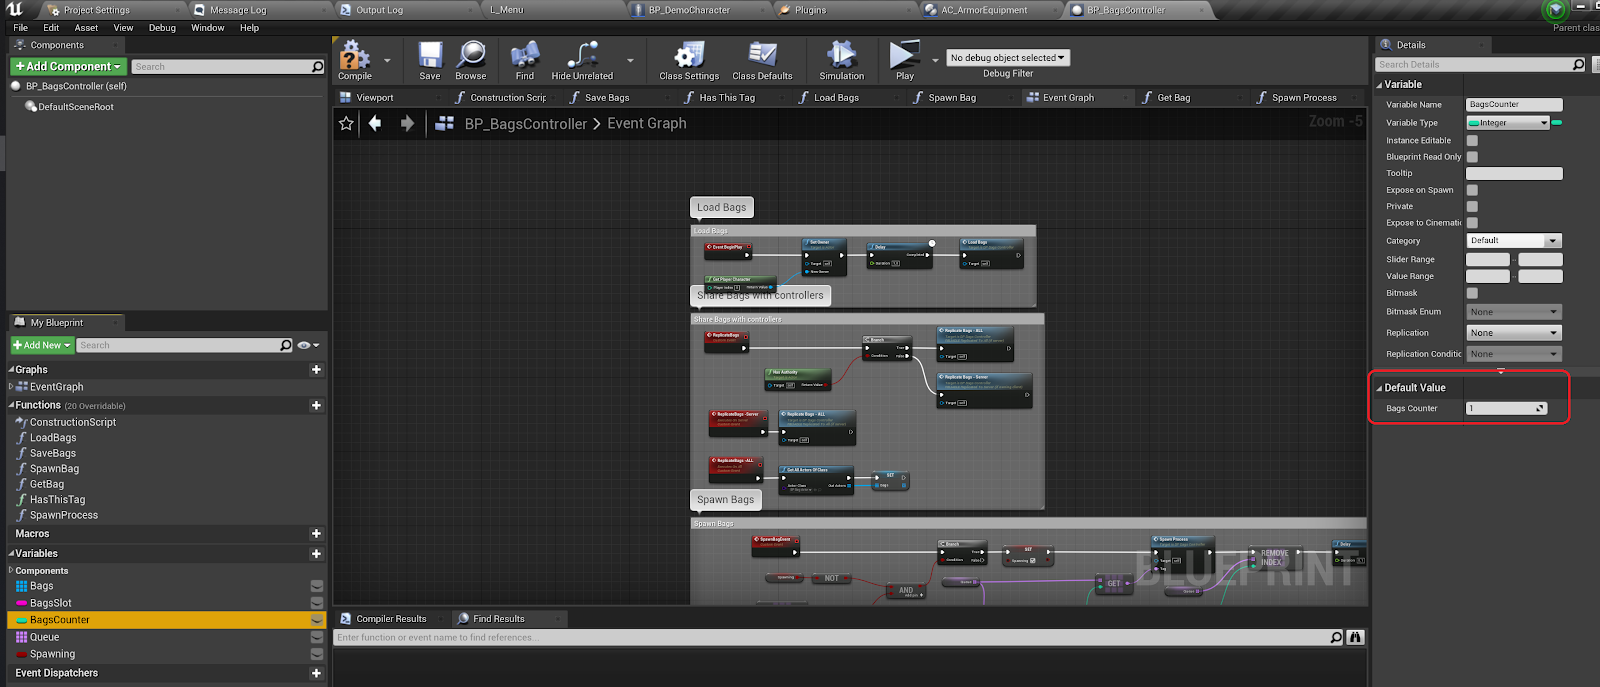
Set the name of the bag in the helper to bag_”n”, where n is the index of your bag (first bag will have “Bag_0”, second bag “Bag_1” and so on”. As 0 is already locked by us you need to set the index in the bags controller to 1. Make sure you don’t have any game saves. Close the project and delete the Saved folder in the folder with your project.