Creating a new Map Widget
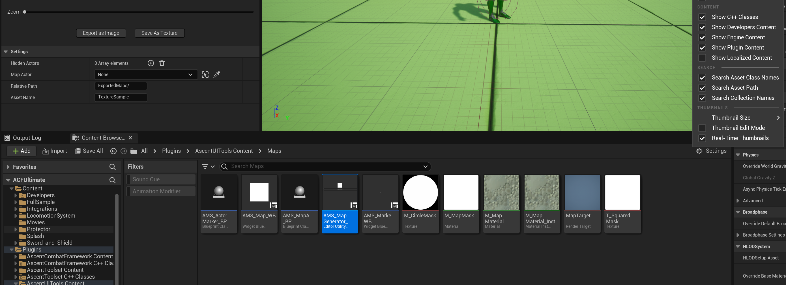
To create a new map the first thing you’ll need to do is to open the AMS_MapGenerator_EUW (Editor Widget) located in your Plugins/AscentUIToolsContent/Maps folder. If you can’t see this folder just remember to activate Plugins content in Settings->Show Plugins Content as shown in the image below.
From the same folder you’d need to drag in to your map the AMS_MapArea_BP which will be responsible of defining the boundaries of the current map.
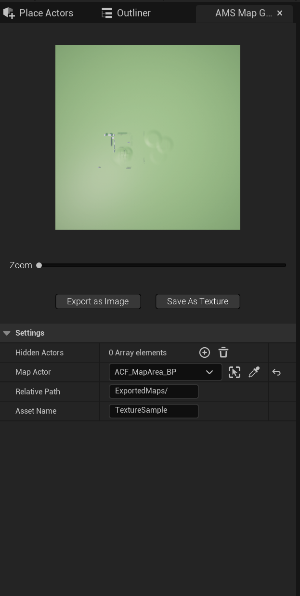
Inside the MapArea actor you can define the area size and you can move the actor to define the position, when you are happy with your configuration, you can just assign the MapArea actor to your map generator widget which will give you a preview of your map. You can then select acotrs to hide and save it as a UTexture or exporting it as PNG to edit the image in any external image editing software like Photoshop.
For every AMS MapArea BP Actor with the TextureType property you can decide if you want to use the automatically generated Texture (Render Target) rendered by actor itself or an external Texture (Texture) imported by the user (Es: if you want to use a custom made image from Photoshop, edited and imported in Unreal).
To display the generated Map with all the related functionalities you’d need to use the AMS_Map_WB widget. Since you can have many AMS MapArea BP in your scene representing different part / layers of your scene the widget needs to know which one you want to display. All the logic to communicate between the widget and Map actor are handled inside the AMSMapSubsystem.
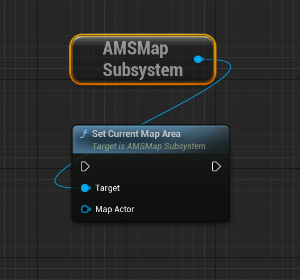
To decide which of the map textures should be displayed in the widget you can call SetCurrentMapArea from the AMSMapSubsystem (which is accessible from everywhere being a GameInstanceSubsystem).
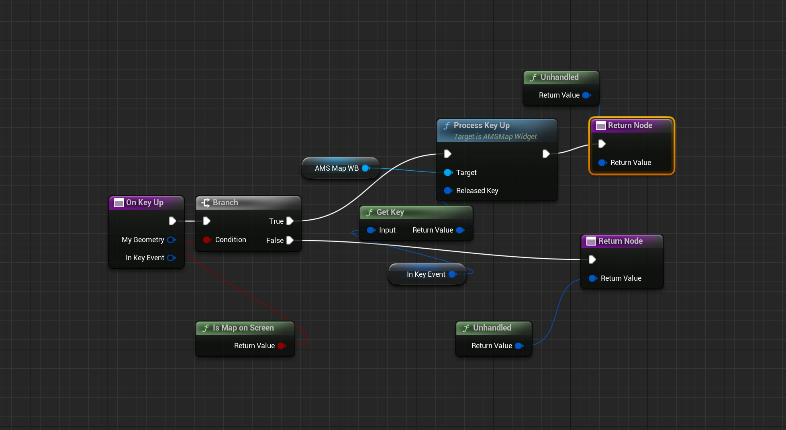
Inside the widget itself you’ll find all the various function to navigate it both with gamepad and mouse by redirecting the functions:
OnKeyUp / OnKeyDown/ OnAnalogChange to be redirected to
ProcessKeyUp / ProcessKeyDown / ProcessAnalogChange as in this picture:
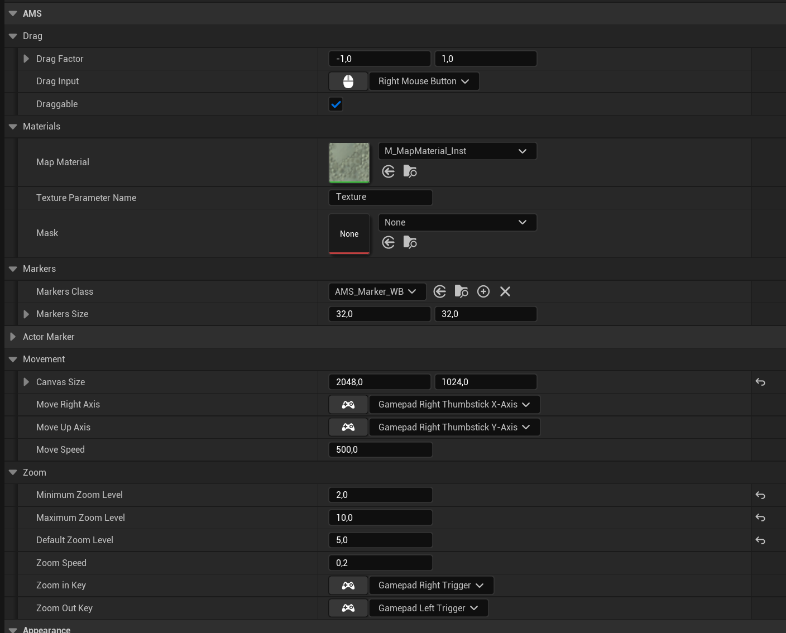
The last thing to do is configuring your AMS_Map_WB’s properties that you can find when selecting the widget in your widget tree and locating the AMS tab in the DetailsPanel. In particular here you can setup all the buttons to be used to interact with your map, the drag factors, the zoom and movement speed, the widget to be used for markers and the Mask to be applied on top of the Map itself (ES: for a minimap you can use AMS_CircleMask to have your map widget
inscribed within a circle). Also inside your widget you’ll have a lot of usefull blueprint node, all located under the AMS tab to change all the properties at runtime.
Center On Player: This function centers the map to have the marker of the local player at the center of the widget, can be very usefull to use the map system inside a minimap widget.