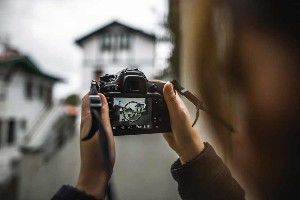
You use it all the time. Each time you press the shutter button halfway, your camera focuses on its own like a grown-up. Yes but do you really know all the tricks of autofocus? I bet not! Let's see how it works and how to make the most of it!
If you ever prefer this format, know that I also made a video where I explain everything in 5 minutes, and where I make a few jokes (hoping that I am not the only one that they make laugh) Otherwise, you can continue to read the article below.
Autofocus points
If you have read the course on Brightness Metering Modes, you may remember this diagram which represents what you see in the viewfinder, namely a number of collimators:
The collimators are therefore these squares and rectangles with a point in the middle, which lights up when the focus is made. They are in fact the representation in the viewfinder of the electronic cells which are used to make the autofocus.
Well, collimators are the basis of your camera's autofocus system. We will try not to go into too much unnecessary technical detail, and we will focus on two essential characteristics that you should know about these collimators.
The 3 types of autofocus points
You've probably never noticed it, but the center point is usually a square, and the peripheral points are often rectangles, some of which are oriented vertically and others horizontally (at least on entry or rear-view reflexes). midrange). And this matters.
The square central collimator actually represents a cross- shaped cell (or even a star on high-end SLRs), which can thus autofocus regardless of the orientation of the subject in front of it..
Conversely, rectangular collimators can only focus on subjects oriented perpendicular to their own orientation. I speak Chinese ? Let's take each example one by one to better understand:
A vertical rectangular collimator can easily focus on a horizontal subject, but will have difficulty or even fail to focus on a vertically oriented subject.
Conversely, a horizontal rectangular collimator will be able to focus on a vertical subject, but will have more difficulty on a horizontal subject.
Finally, a square collimator (cross) is a kind of combination of the two, and can easily focus regardless of the orientation of the subject.
To better understand, try to focus with different types of points over the edges of your screen eg computer: you will see that the vertical rectangles do manage to develop on the edges top and bottom of your screen, and vice versa.
Thus, what makes the performance of autofocus systems on high-end reflex cameras is that they are composed mostly (or even entirely) of cells in the form of a cross or even a star, and therefore of square collimators, which are not 'have no trouble focusing according to the orientation of the subject. Not to mention that they have a lot more focus cells, which also helps a bit.
The size of the autofocus cells
It seems to me very useful to specify this, because it can easily play tricks on you: the cell is generally larger than the collimator which is displayed. This means that the focus is not made precisely on the small flashing point, but somewhere in the square / rectangle, and even a little beyond. What problem can this pose?
Well when you're working at shallow depths of field, if the focus isn't exactly where you want it to be, your focal point may get blurry. Too bad for a focal point, you will admit it to me.
Especially since the autofocus tends to choose contrasting areas to focus. So it can focus on a contrasting area close to the exact spot where you wanted to focus.
This is what happened to me for a portrait when I was starting out : I swear I had focused on the eye, but the autofocus had actually focused on the nearby strand of hair.. And now, the eye is blurry, especially since I was working at f / 1.8!
In this kind of situation, it can therefore be useful to work in manual focus, but it is still necessary to distinguish precisely the sharpness in the viewfinder, which is not always obvious!
Autofocus modes
Second essential component of this system: the autofocus mode. And yes, the device has multiple ways of focusing, and that can change a lot of things.
One Shot / AF-S mode
One Shot at Canon, AF-S at Nikon and many other brands, this mode is the simplest, the one you all know and which is set by default on the camera. It is used as follows:
You press the shutter button halfway : autofocus is performed. The focus point (s) flash, and a beep sounds, to confirm that the autofocus has been done.
As long as you keep your finger halfway, the focus will not move no matter what movements you or your subject may make.
When you fully press the shutter button, the picture is taken with that focus.
This mode is perfect for still or almost stationary subjects. It's simple and intuitive, and it's almost the first thing you learn to master on a camera.
AI Servo / AF-C mode
This mode is more complex to understand, but may be essential in certain situations. In this mode, the autofocus never stops. The camera constantly focuses by following your subject's movements.
In other words, you never have visual confirmation (the flashing point) or auditory (the beep) of the focusing, since it is carried out continuously. When you release, the picture is taken with the last focus made.
It is an almost essential mode on moving subjects, in particular at reduced depths of field where the slightest movement of your subject can make it blurry. This mode can be useful for photographing your dog running towards you, for example.
A very good example of its use is the concert photo: let's say that you want to shoot in a dark bar the a little agitated guitarist of the rock group which occurs there. This mode answers a lot of problems:
The subject moves around a lot, so a One Shot focus would be almost immediately messed up by his movements.
There is little light, so it is difficult to focus, so redoing the One Shot with each movement would be complicated.
We shoot at wide aperture (to compensate for the lack of light) and close to the subject: the depth of field is shallow, and therefore the subject really must not have moved since the moment you focused.
The other modes
There is an intermediate mode, AI Focus / AF-A, which behaves like One Shot mode, except when it detects movement of the subject. For a moving subject, it is always better to use the previous mode, as the AI Focus / AF-A will always be slower to detect it.
Depending on the range of cases, there are also more advanced modes that I won't cover here, but which probably described in the manual (which you must read!)
How to master focus and autofocus
Do not use automatic focus selection
If you leave it up to your camera to decide where to focus, you might as well let it choose an important parameter. The place where the image is going to be the sharpest is important, isn't it?
In short, manually choose which collimator to use to focus.
Use the dial to select the collimator
To select the collimator, you can press the dedicated button then navigate between the different collimators with the cross. But that's good when you have the time.
With your eye in the finder, you'll need a faster method. Well, all you have to do is press this same button and use the dial : in the viewfinder you will see the collimators light up as you change your selection. Very handy when you need to change quickly!
Note that on some more high-end SLRs, you will have a min
i joystick that will allow you to move the collimator without pressing another button. Even more practical and intuitive!
Finally, on a lot of hybrids, you can move the focus point thanks to the touch screen, and there it is even more intuitive!
For more information, please visit https://www.dzofilm.com/